Showing posts with label fibers/fabrics. Show all posts
Monday, September 10, 2012
Buckram, Surface Design, and French Flowers--JCCFS, 2012
For the past three years I have been fortunate enough to be asked to teach a 'Unique Offerings' class at John C. Campbell Folk School in the Appalachian region of North Carolina. The motto of the school is 'Sing Behind the Plow' and the logo is the plow team you see above. This metal piece I found tacked to the entrance to one of the many craft discipline studios on this beautiful 300 acres campus.
There is a very rich history to the Folk School, named after Olive Campbell's husband. The Campbells were enamored with the rich society mountain folk lived in and documented and cataloged that society for many years. The School is a culmination of that effort, founded by Olive Campbell and Marguerite Butler.
Gorgeous vistas all around this campus.
This year I taught a week-long class and then a weekend class. Week-long classes start on a Sunday night and end at lunch on Friday. Weekend classes start on a Friday night and end on Sunday at lunch. It made for a full week of great classes, fun people, new experiences and some fabulous work from my students.
The first class was entitled Hats and the Fabrics That Love Them (Buckram and Surface Design). Yes, that is a mouthful! The class was designed to incorporate three different ways to make a buckram frame hat, and then (the really fun part) to create your own textiles from a fabric stash, using a number of surface design techniques.
Surface design techniques included, pleating, slashing, dissolving, overlaying, embossing, and more. In the photo below you see a few samples and a covered buckram form without the rich textile covering as yet. Each student was required to make at least 4 textile samples to take home with them. They could choose whatever technique they wanted to cover their buckram hats.
Below, Cat works hard on her buckram pillbox. Three buckram hats were made: one was a pre-formed shape from a millinery supplier, another was a self-created dry buckram pillbox, and the other was a wet-shaped buckram form of the student's own design.
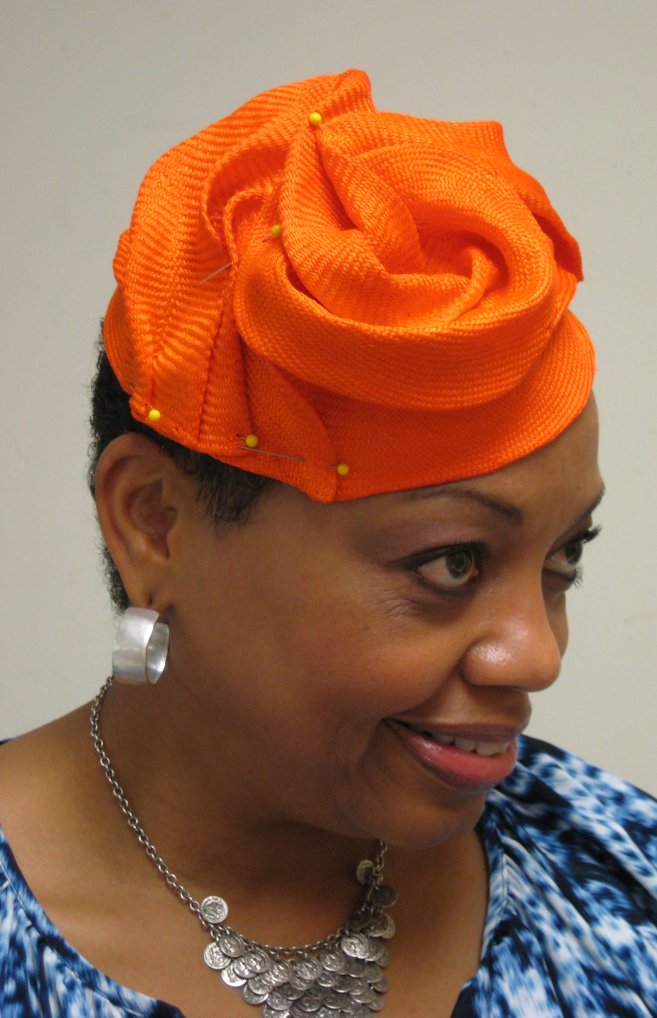
Beverly working on her pillbox. Beverly is a committed hat-wearer and wore one each day to class.
As we progressed through the week we also progressed in difficulty of technique. Pictures of the shapes from the wet-shaping part of the class and the most difficult of the three buckram techniques.
Marilyn gets silly!
At the closing ceremony each week-long class displays the work they have created during their study. I wish I had better pictures of all the work tmy class did. Unfortunately, I only had my phone camera. My bad. But each student displayed some of their sample textile pieces and at least one of their hats, most displayed two and WORE one! When it was time for me, as the instructor, to introduce our work to all the other students from the week, ALL my students paraded to the front of the auditorium so that everyone could really appreciate the WEARING of the hats! And everyone loved it!!
Before I get into the French Flowermaking portion of my time at the Folk School I'll show you a few more pieces of the magnificent JCCFS puzzle. These photos are from displays in the History Museum on campus, to further explain this magical place. Read the short bio of John C. Campbell below.
John C. Campbell
Olive Campbell and Marguerite Butler.
A few more photos of sites around campus. You walk almost everywhere on campus and all these lovely little vistas appear out of nowhere.
On to the weekend class! French Flowermaking. On Friday night we all processed our fabrics so that we would be ready with dry fabrics the next morning. Weekends are very full classes here! Because they are very drippy after the processing, we hung them out to dry under a covered area in front of the Fiber Arts Building on make-shift clotheslines. When I went by to check on them early the next morning, the whole area was covered in fog. Makes for a beautiful and eery photo.
Enjoy the lovely flowers made during the class from many different fabrics--silks, linens, cottons; sheers, opaques, velvets, velveteens. Each student made two flowers--a large rose and a peony.
Many fiber arts are offered by the school over the course of a year. If you are interested in finding out more about the school and the many other offering throughout the year, click here. You will not be disappointed!
Wednesday, August 3, 2011
French Flowermaking in California--Lacis in Berkeley
I taught two one-day classes there--French Flowermaking: Roses, and French Flowermaking: Orchids. Below are pictures of the processes the class went through to get their flowers.
Vanessa came all the way from Yucatan, Mexico to take the class. Here she is hanging some of the many pieces of fabric the class sized in order to make the roses and orchids.Did I mention lots of fabric? So much that the clothesline wouldn't hold them all and we had to use the fence! They actually were very pretty flapping in the cool San Francisco breeze.
Close-up of a few roses.
And then the next day we had a separate class, of 11 folks, on making orchids. There are lots of different orchids but I chose the cymbidium orchid for the class to make.
Joan wires her petal pieces before assembly.
Vanessa chose to use a black velvet overlayed with a vintage lace she purchased from Lacis.
Wired and ready to assemble. Don't you love how she's combined these fabrics?
And here's the final product all shaped, wired and assembled. Beautiful!
Leonard's cashmere felt (he's a felter) and cotton velveteen pieces for his orchid. Interesting combination and it turned out so nice! As long as the fibers are natural you can use anything to make a flower in the methods we used...even cashmere felt!
Leonard's orchid...of cotton velveteen and cashmere felt (the light blue). Gorgeous!
Ingrid, ME, and Doreen. Love the orchids in your hair, ladies!
I stayed in a fabulous bed and breakfast about 6 blocks from Lacis, in Berkeley. I'm only showing you this because, well, it was a great place to stay...AND it was called The Rose Garden Inn! How appropriate for a weekend of flowermaking!
We can't possibly compete with Mother Nature! She knows how to make a rose or two. This rose was almost the size of a dinner plate!!!
Thanks, class...and Lacis, for making this a great time in California. Can't wait to get back next year for some millinery classes at Lacis! Stay tuned and thanks for reading.
Tuesday, July 12, 2011
Dyeing Straw--Millinery Class in Atlanta, Georgia
This past weekend I taught a spanking new millinery course at the Spruill Center for the Arts, entitled 'Dyeing To Make Hats.' It is a class I've been thinking about for quite some time; a skill I've been working on for my own hats for a few years now.
Have you wanted to dye your own straw, whether a hood, capeline, or one of the straw yardages like sinamay, paris cloth, jinsin, silk straw or raffia? See the results of this class' wonderful dyed straws.
All these beautifully dyed straws began as natural or white straw and were dyed with professional, permanent, fiber reactive dyes. Easy, safe, and effective.
HINT: International Millinery Forum attendees...check this post out. Details forthcoming about this class at IMF in January 2012.
A look at some of the dyed straw yardages as they dry and are made ready for the hatmaking portion of the class. Note that each straw is different...from painted flowers to stampings to abstract usage of dye on straw.

Here are a few of the stamps used in class. Very simple but used to beautiful advantage!
Suzanne did a fantastic job of using stamps and stencil brushes to create this design on silk straw.
Absolutely love this Asian-inspired design (partly done with chopsticks) by long-time student Judy. Great colors too.
Claire created this simple but lovely polka-dot design on raffia. See the great fringe?
Oooohhhhh! Gotta love this stamping/drizzling piece by milliner Diane of Hats To Di For! Pretty blue butterflies!

Here's an example of a free-hand design created by Margalee. Quite nice!
Claire and Suzanne hang up some of the dyed and washed out straws. More about that next.
After we vat dyed, tie-dyed, painted and stamped our straw yardage, and then allowed it to 'batch' for a period of time, it was time to wash out the residual dyes. Rinse, rinse, rinse, rinse. Right class? Rinse, rinse, rinse....
Sonja and Gloria with a couple of end result hats dyed in class. Sonja (left) in her tie-dyed sinamay and Gloria in her vat dyed parisisal hood. Both free-style shaped. Lovely!
Claire in her chartreuse dyed hood which she then free-form blocked. This was Claire's first true millinery experience and she did a fantastic job!
Sonja in a free-form silk straw. GORGEOUS! Love, love, love the lines!
Margalee in hot pink silk straw fascinator. Don't you love this?
Pretty tie-dyed sinamay from Gloria. Gloria is the milliner behind Gloryous Hats.
Stop the presses! Sonja's free-form styled green raffia straw topper. Everyone loved this! Vat dyed raffia yardage.
Another of Sonja's hats...dyed and styled in class.
Ooooooo. Love Margalee's tie-dyed headpiece you see here. This is an easy technique of dyeing but with dramatic effect. Margalee and her sister Melissa (see later post) have heretofore done mostly Kentucky Derby type hats, since they are from Kentucky! But I have a feeling they will be expanding their scope of styles for those ladies attending Derby next year.
Claire in her purple tie-dyed fascinator. Her second hat ever! Great job, Claire!
Diane takes her 'eggplant' knotted sisal hood and creates this amazingly styled fascinator. Who needs embellishment with design like this? Love it!
Melissa (from Kentucky) spent alot of time designing and creating this bias-fringed, tie-dyed fascinator. I think it is a fantastic piece, and a departure from the styles she and her sister Margalee are usually creating. Love it that they are open to new styles for their clients.
Suzanne, an art history major, used her vast artistic knowledge to create her pieces of tie-dye, stamping and drawing yardage. Great use of color ranges and styles, Suzanne!
As usual, you are looking at pieces that may or may not be completely styled and finished hats and headpieces. I always treat my classes as 'process not product'. In other words, you will know a number of techniques at the end of my classes, but your hat may or may not be complete as far as embellishments, etc. I think learning the millinery techniques is so very important. Everyone can embellish to their heart's content either in class (time permitting) or at home with all your accoutrement. A very personal decision, and one I really shouldn't even be involved in with your hat. I'm soooo much about the technique being perfected, NOT just the embellishment.
I hope you enjoyed just a taste of what it takes to dye straws. Look for classes in 2012 that will expand this newly created class from moi!
Have you wanted to dye your own straw, whether a hood, capeline, or one of the straw yardages like sinamay, paris cloth, jinsin, silk straw or raffia? See the results of this class' wonderful dyed straws.
All these beautifully dyed straws began as natural or white straw and were dyed with professional, permanent, fiber reactive dyes. Easy, safe, and effective.
HINT: International Millinery Forum attendees...check this post out. Details forthcoming about this class at IMF in January 2012.
Here are a few of the stamps used in class. Very simple but used to beautiful advantage!
As usual, you are looking at pieces that may or may not be completely styled and finished hats and headpieces. I always treat my classes as 'process not product'. In other words, you will know a number of techniques at the end of my classes, but your hat may or may not be complete as far as embellishments, etc. I think learning the millinery techniques is so very important. Everyone can embellish to their heart's content either in class (time permitting) or at home with all your accoutrement. A very personal decision, and one I really shouldn't even be involved in with your hat. I'm soooo much about the technique being perfected, NOT just the embellishment.
I hope you enjoyed just a taste of what it takes to dye straws. Look for classes in 2012 that will expand this newly created class from moi!
Subscribe to:
Posts (Atom)