Below you see the class collection of finished flowers. Most were made from silk fabrics but I know of at least one cotton flower in the mix. Nice, huh?
I'll be teaching a flowermaking class in Berkeley, California, at the end of July. Be sure to check out my 'classes' page on my website for dates and other information.

 Pretty petals all cut out according to the supplied patterns. Some ladies chose to create flowers with multi-colored, multi-textured petals. Some of these fabrics are hand-dyed. Beautiful!
 Here's an example of a silk chiffon that has been hand-dyed. Lovely color combination. She created this dyed piece in an earlier class at TLD. TLD teaches many, many different fiber-related classes. Check them out!
 Laura and Mary Alta begin the shaping process. Each petal is shaped with heated flower tools. Different flower tools create different shapes.
 Kathleen and Peggy hard at work!
 Mary Alta's completed flower. You will note that each and every one of these flowers is different, even though everyone started with the same pattern. This is the beauty of flowermaking! Variables include: different amounts of sizing on the fabrics, amount of heat and pressure on the petal pieces, the kind of fabric being used, the way the petals are assembled...all contribute to the uniqueness of each flower.
 This particular flower is composed of embroidered cotton. Embroidered fabrics can sometimes be difficult to shape since the embroidery threads 'hold' the fabric in place and don't allow it to be shaped as easily, but this is so pretty!
 Lovely and suitable for so many uses on hats, gowns, home decorations and more.
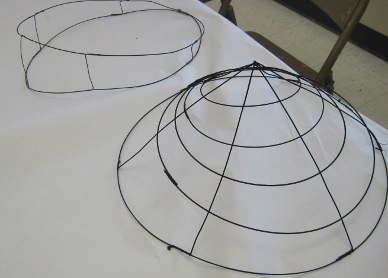
The second class I taught was meant to teach some very basic skills in working with millinery wire. Because of the Royal Wedding event and the attention it brought to both bridal and fascinator type headpieces, the class used the wire skills to create their own headpieces.
 Peggy's completed form, wrapped in black eyelash yarn to cover the wire. I don't have a picture of her completed piece but I love the form just like it is!
 Laura created a very nice form then wrapped it in hand-dyed silk.
 Michele used a multi-toned yarn to cover her frame. Here you see her adding beauty-marked veiling to a certain 'space' in the form. Nice use of veiling! You'll see the completed piece further down the page.
 Mother/daughter team of Dwana and Donna showing off their big-looped wire pieces. While these are not finished products, they do show great promise! Wish I could see their final embellishments!
 Jennifer created a wonderful mass of wires, each wrapped in brightly colored Indian sari fabrics. What more do you need?
 Pretty Edwardian-inspired wire frame, covered in lace, veiling, trims and a fabulous applique piece. Looks oh-so-vintage with a modern twist. Love it, Kathleen!
 Michele's finished piece with some great 'bobbing' crystals. See the way she's added the veiling to just a small portion of 'space' on the frame? Very nice!
So that was Chicago! Next teaching gig is Washington, DC, where we'll be making Big Beautiful Brims--covering buckram frames and creating large fabric covered brims. Class is already full!
Be sure to check out the other classes I'll be teaching the rest of the year--www.hatshatshats.com/classes.htm.